Tutorial 1, the DirectX framework
Before getting caught up in the Tokamak physics engine it's worth spending a small amount of time looking at a simple DirectX framework. Each of the tutorials will use this framework as a starting point so it's a good idea to have a basic understanding of what it's doing. There's no Tokamak physics in this tutorial, that'll come in the next one.
If you're sure you're not interested in the framework (for example if you're looking to use OpenGL instead of DirectX) then you can skip this tutorial and proceed to the next, as the parts of the code that are relevant to the Tokamak engine will be highlighted in each of the following tutorials. Otherwise I would encourage you to download and work through the source in the MSVC IDE in order to understand how it is put together.
I use this framework as the basis of all my Direct3D applications and have found it to be stable and useful. I am indebted to the work of Robert Dunlop at The X-Zone for a lot of the code contained within here, many thanks for the helping hand Robert. I highly recommend you have a look through Robert's site, it's full of very useful information for DirectX programming.
Because of the amount of code in the framework I won't go into it at great length here, most of the code is fairly well commented and should be readable. I will summarise what the framework does, however. I am assuming that you have a basic knowledge of DirectX before working with this code; if not, it may be worthwhile reading through some DirectX tutorial sites such as those provided by Drunken Hyena. I will also assume that the DirectX SDK (version 8 or later) is installed on your computer and that the appropriate include and lib folders have been configured within the MSVC IDE.
When the code begins to execute, the WinMain procedure is used to start the code as normal. This then calls a number of functions, as follows:
| Function | Purpose |
|---|---|
GetFullScreen() |
Asks the user whether to run in full-screen mode or in a window. |
InitWindow() |
Initialises the window that we'll be rendering to (for both full-screen and windowed mode) ready for us to use. Note that the window size (or screen resolution for full-screen mode) is defined by the WINWIDTH and WINHEIGHT constants at the top of the source. Feel free to change these to suit your preference. |
InitD3D() |
Creates the Direct 3D device object to our specifications. |
InitScene() |
Sets all the relevant Direct 3D state properties (lighting, filtering, etc.) ready for us to render. |
InitTimer() |
Initialises either a high performance timer (if available) or a Windows multimedia timer so that we can get high-resolution real time updates on how much time has elapsed each time we come to render. |
InitObjects() |
Using the vertex buffer data defined at the top of the source code, creates vertex buffers for the objects in use within the application (in this case just the cube). Note that the data for the cube is all defined within the source to make it as clear as possible what is going on, rather than hiding the details of the cube away in a .x file or other external model file. |
If any of these calls should fail, the app immediately quits with an error code. A real application should tidy up whatever objects it has allocated at this point but for the sake of readability I've removed the clean-up code from these samples.
Once this initialisation is all finished we're ready to start running the simulation. The main loop continuously
calls two functions: MessagePump() and Render().
MessagePump() is a fairly standard Windows procedure that retrieves any messages that have been sent to
our window and tells Windows to process them. Once all pending messages have been processed it returns to allow the
rendering to take place. This means that we are able to call into the rendering code at the highest rate possible
without causing our application to lock up.
Messages that are ready for processing will be passed to the WindowProc procedure in order to be handled
by the application. All that takes place in here is a quick check to see whether a key has been pressed (if it has we
close the application) and a couple of necessary updates required to keep our window running smoothly. All other
messages are passed straight into Windows' default message handler for it to process itself.
Render() is where the action happens. This function will be called whenever it's time to update the
graphics on the screen; when running in a full-screen mode this will normally be the refresh rate of the monitor (60 times
per second is the usual minimum here), when running windowed this may be many hundreds of times per second.
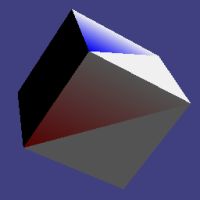
For the purposes of this tutorial, all the Render() function does it to display a spinning cube on
the screen. The screen and Z-Buffer are cleared, the
position and rotation of the cube are set and the cube is displayed. The rotation of the cube is updated using
the timer functions (with the value stored in fElapsed), so the cube will always spin at exactly the same rate regardless
of how many times a second the graphics are actually updated. This is a very important factor when writing a game as it
ensures that everyone will play at the same speed, regardless of CPU/graphics card power or screen refresh rates.
Note that I'm using a number of functions defined in DXUtil.h in order to handle matrix calculations in this sample. These are written to mirror the functions available in OpenGL, which I found significantly easier to use than the "raw" matrix multiplications used by DirectX. You can read more about these functions here. If you decide you don't like these functions, they should be very easy to remove (most of them are only one or two lines of code).
When the user decides to press a key, the gbFinished flag will be set to true, which indicates to our main loop all the way back in WinMain that it's time to quit. When this happens, all of the resources we allocated are freed and the program closes.
The source code and a compiled executable for this tutorial are available in the following .zip file.

TokamakTutorial1.zip
| << Introduction << | >> Tutorial 2, colliding cubes >> |
If you have any comments or suggestions regarding this article, please don't hesitate to contact me.
This article is copyright © Adam Dawes, 2003.
It may not be copied or redistributed without my express written permission.